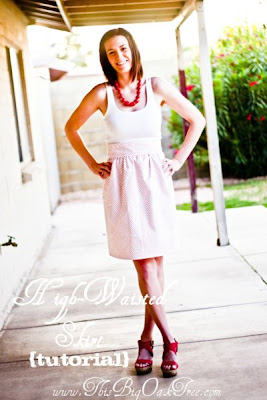
High-Waisted Skirt {tutorial}
After making my daughter's skirt I got to thinking, "Why don't I make one for myself?!?" So that's what I did...and just in time for Easter!
This skirt is designed as a size 2 but can easily be customized to fit any size.
Here's what you'll need:
1 1/4 yards of fabric
Zipper approximately 6" in length
Ruler/yard stick
Fabric marker
Sewing machine
Zipper foot for sewing machine
Fabric scissors
Pins
To start cut out the following:
Main body: 22"h x 42"w
Belt: 6 1/2"h x 28"w (for a size 2)
Start by making the belt. You'll want to measure your waste to find out exactly what size is best for you. My waist is 28" around so that is where I cut the fabric. I cut it there because I intended for the zipper to show about 1/2". If you don't want it to show then you'll want to add a 1/2" to the measurement of your waist and then iron in the sides each 1/4".
Iron up the top and bottom of the belt and then the sides as shown.
Then iron it in half and set aside.
Next iron up the bottom of the skirt body a 1/2" and then another 1/2" as shown. Stitch a 1/4" seam.
Next lay out the skirt as shown so that you can mark where the zipper ends on the skirt. Make sure you tuck some of the skirt up into the belt approximately a 1/2".
Place a pin where the zipper ends.
Fold the skirt in half RIGHT sides together and pin up the skirt ending at the pin marking the zipper ending. Stitch from the bottom up to the zipper pin.
Iron open the seam.
Stitch the flaps down at the bottom.
Next gather the top of the skirt by stitching two loose stitches next to each other along the top. DO NOT BACK STITCH!
Then pull one of the threads to gather the fabric. You will likely need to do this to the other end as well since it can get stuck or too tight on one side.
Lay out the skirt with the belt above it as shown.
Put the skirt in between the belt opening and pin in place. MAKE SURE THAT IT IS TUCKED IN ALL AROUND. Stitch a seam where the skirt and the belt meet. Be sure to leave the ends where the zipper goes unsewn so you can put the zipper inside the belt flap as shown below.
Next add the zipper. Place the zipper between the belt flaps and under the skirt. Pin and stitch using a zipper foot on your sewing machine.
The zipper foot allows you to get nice and close to the zipper.
Do the other side and your done!
Simple as that.
Now enjoy a few shots from my photo shoot ;)
(I hate modeling!)
This is my favorite one ;)
Let me know if you have ANY questions!
Happy Crafting & Happy Easter!


You are a clever girl, Amy!
ReplyDeleteIt looks great! Nice job! :) I just made a new skirt to wear on Easter too. Yea for sewing for ourselves! Haha!
ReplyDeleteHappy Day,
Michelle
www.daydreambelievers.net
Thanks! This was my very first try making clothing for myself. I think I'm hooked!
DeleteI am visiting via TT&J. I absolutely adore this project! So clever.
ReplyDeleteIf you have a moment, please stop by my blog. I created a few spring crafts this week.
Have a wonderful weekend.
Super Cute! I'm pinning. I love a good skirt tutorial.
ReplyDeleteThanks Tara!
DeleteWonderful! I need to whip up a few things to add to my wardrobe... it's getting pretty tired. What a great idea :) I'm definitely gonna give this a go.
ReplyDeleteThanks for sharing!
Thanks! I'm not sure why but I feel less guilty spending money on fabric and then making it myself even if I could find it for the same price in the store!
DeleteSo cute! I love high waisted skirts and your fabric is awesome!
ReplyDeleteliZ
This is a great tutorial!! Thanks for posting!
ReplyDeleteVery cute skirt! Will have to try this tutorial. Pinning this now!
ReplyDeleteYeah! I love seeing my stuff on Pinterest :) Thank you!
DeleteThis is such a great tutorial and turned out so cute! I would love for you to link it up to my link party. I know my readers would love it too! http://weliketolearnaswego.blogspot.com/2012/04/what-i-learned-wednesday-5.html
ReplyDeleteThat is so adorable! You are so talented. Great blog :)
ReplyDeleteHi, I found this via Pinterest. The skirt is so cute! But, my main questions is where did you get your wedges? Love them!
ReplyDeleteHa ha! Actually they are Target...I know fancy! They were only $25 :)
DeleteHow would you convert the size?
ReplyDeleteFirst thing to do is measure your waist where you want the skirt to sit. Take that measurement and add a 1/2" to account for the folding under and ironing that will happen on both ends of the "belt". Next thing to consider is the 42" width of the main "body" of the skirt. If you are going up in size and you would like to keep a gathered look you may need to increase the amount of fabric. I tell you how to make a skirt with two seams in the "body" for the high-waisted sash skirt. To keep it from being too full though you'd need to adjust the panel sizes for the front and back. Hope this is helpful and good luck!
DeleteThanks!
DeleteDo you have an Etsy account? I don't have the time to make one myself but I would certainly pay to have you make one for me. It is so cute! Thanks!
ReplyDeleteHi Britt, I'd love to make you one! Take a look at my "shop" tab above and then email me at amy@thisbigoaktree.com with your measurement :)
DeleteLooks excellent! Just wondering what a size 2 equivalent in Aussie sizes might be?
ReplyDeleteHi Tiffany, A size two for me is a waist size of 28". I made this skirt with the idea that the waist band would be 28" finished edge to finished edge. I hope this helps and good luck!
DeleteThanks for sharing, I'm in the process of making me a high waist skirt. Thank you so much!!!!!!
ReplyDeleteYou're very welcome! I hope you enjoy the process and get the skirt you were hoping for :) Good luck!
DeleteWhat type of fabric did you use for this skirt? I can't really tell from the pictures if it was cotton or what lol. I really love this tutorial and I'm thinking of giving it a try. :)
ReplyDeleteHi Rachel, The fabric is 100% cotton with no stretch in it. Good luck!
DeleteDo you think it would be possible to add pockets to this like the high waisted mini skirt that you did? I really like the defined waist in this one and would like to sort of combine the two designs. I am just not sure if it would make it too bulky?
ReplyDeleteHi Jessica, You could definitely do it. You'd have to have a seam on both sides of the skirt rather than the one in the back. You can refer to the High Waisted Sash skirt of how to make the skirt with two seams. I need to do a post on adding pockets...
Delete